Kinesiology Tape Guide: correct application, wearing, and removal
From cutting to removal: Learn the basic technique for kinesiology tape. With illustrated examples for knee and neck, manufacturer information on wearing duration, and clear notes on risks.
Published on
·15 min read
Image: saneq
How do you apply kinesiology tape, how long does it stay on the skin, and how do you remove it? This guide takes you through the basic technique and everyday use of tape. Two examples show the application on the knee and neck – to follow along after you have had the application demonstrated professionally.
This guide by the saneq editorial team is based on the instructions for use by Hartmann (DermaPlast ACTIVE) and the instructions from Hirslanden. We also use other manufacturer information and scientific reviews. The products come from our range; we did not carry out our own practical test. The schematic images are our own illustrations. We do not claim that the institutions mentioned recommend or authorise this guide.
What can kinesiology tape achieve – and where are the limits?
Kinesiology tape is an elastic adhesive tape for use on muscles and joints. It allows movement; its adhesive is free of active substances. Whether an application is appropriate for your symptoms should be assessed by a medical professional.
A review by Mo et al. from 2026 includes, according to the BMJ press release, 310 randomised studies with 15,812 participants. Short-term improvements in pain are possible. However, the evidence is very uncertain. Medium-term effects on pain appear minimal to negligible. Any advantage over sham taping is also small and uncertain. No reliable effect for an individual can be inferred from this.
What do I need for application?
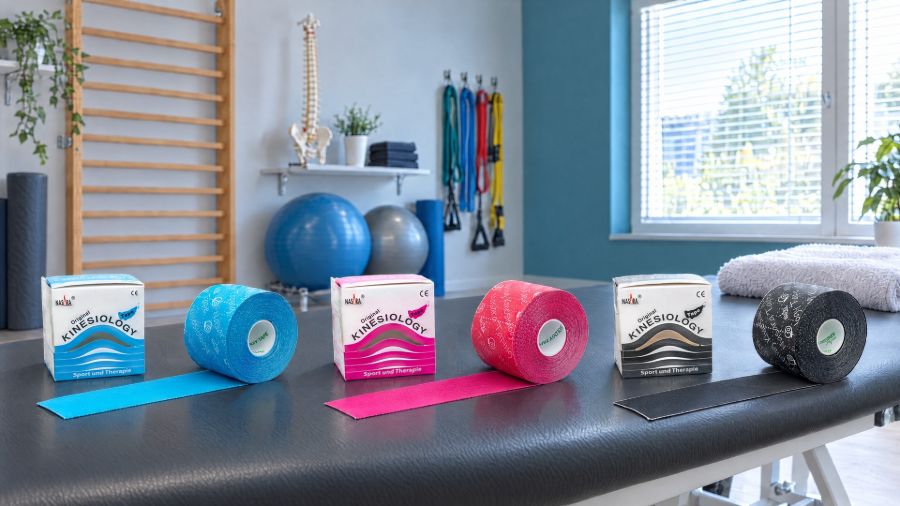
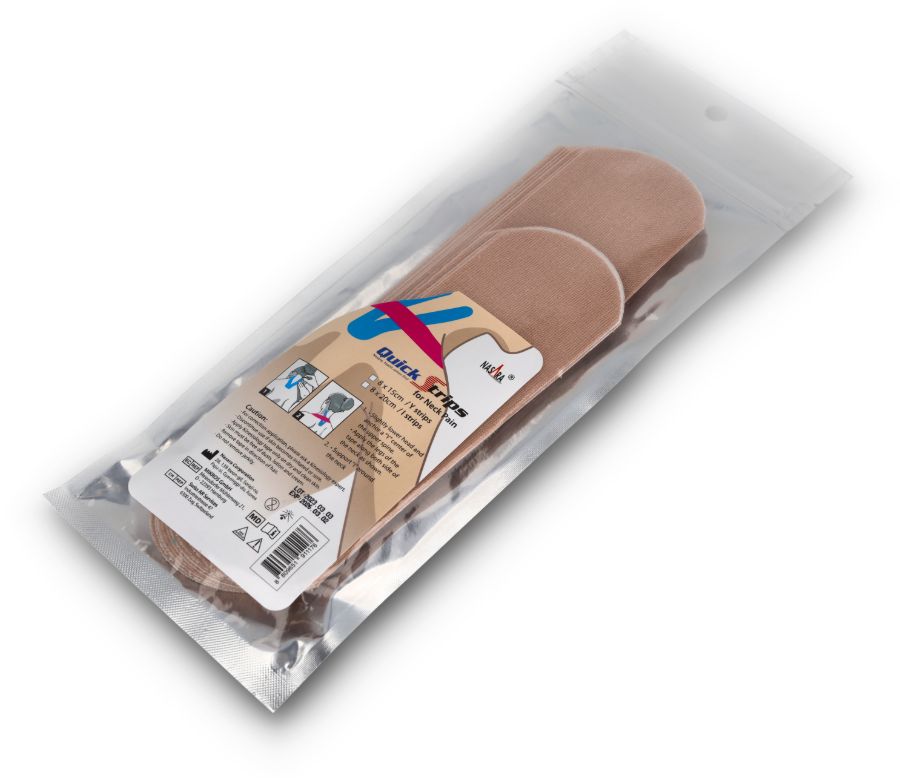
A roll of kinesiology tape to cut to size or a PreCut set for the intended body area.
A sharp pair of scissors for clean cut edges and rounded corners.
The instructions for use of your tape; for the neck example, an additional helper is needed.
You can find rolls and pre-cut strips among the kinesiology tapes, and scissors and medical adhesive removers in the taping accessories. Keep tape out of reach of children.
You can find other types of tape in the tapes overview. Grid tapes have a different shape. The following strip applications are not instructions for using them.
How do I apply kinesiology tape step by step?
Prepare the skin. Clean the skin and remove lotion or oil residues. Let it dry completely. Trim bothersome hair if necessary. For sensitive but otherwise healthy skin, Claraspital recommends a test strip. Remove it immediately if there is a reaction. A test strip does not override contraindications.
Cut strips. Choose length and shape according to the specific instructions. Leave the backing paper on the tape for cutting. Round off the corners. The table below explains I- and Y-strips.
Position the body area. Adopt the position shown for the application. A single joint or head position does not suit all techniques.
Remove backing paper. Tear the paper carefully at the required end. Initially, remove only the part for the start. Remove the remaining paper gradually during application.
Apply the starting end. Apply the starting end to the skin without stretching it. This part is also called the base or anchor. According to Hirslanden, the start and end remain without tension.
Apply the strip. Apply the strip along the path demonstrated by a professional. Whether the middle part is stretched is stated in the respective instructions. Do not create folds in the tape or skin. The tape must not constrict.
Apply and rub down the ends. Place the end without tension. Stroke from the base to the end or from the middle outwards. Rub the tape with your hand to activate the adhesive.
Check the application. Check skin sensation and fit. Remove the tape immediately if swelling, discoloration, sensory disturbances, increasing pain, itching, or other skin reactions occur.
The shapes can be distinguished as follows. The cutting description follows the shape guide by DRACO. The knee and neck examples below use exclusively I-strips.
Shape
How the cut is made
Relation to the examples
I-strip
Cut a continuous strip to the required length. Round off its corners.
The unsplit strips used in both Hartmann examples.
Y-strip
Cut a strip to length. Starting at one end, split it down the middle lengthwise. Leave a shared base at the other end. Round off all outer corners, including those of the two branches.
Shape guide for other applications. Pre-cut Y-strips save you this cutting step; use the instructions supplied with the set.
How is tape applied to the knee?
This example is based on the Hartmann instructions for DermaPlast ACTIVE Kinesiotape (as of 05/2017). They specify two I-strips of about 20 cm and two of about 25 cm. Sit down. The knee is well bent, with the foot resting on the floor. Have the starting position for this application demonstrated to you.
Apply the starting end of the first short strip below the kneecap without tension. Guide the strip past the outer side of the kneecap towards the thigh. Follow the tension instructions above and the professional guidance. Apply the upper end without tension.
Add the second short strip on the inside in the same way. The strips overlap below and above the kneecap. Together they form an oval around the uncovered kneecap.
Apply the two longer I-strips with tension along the same sides, overlapping the short strips. This creates a second, slightly larger oval. These ends are also applied without tension. Rub all strips from the base to the end.
Straighten the knee and check the application. The kneecap remains uncovered. At this stage, Hartmann describes small skin folds at the kneecap. They are not evidence of a therapeutic effect.
Knee application based on Hartmann, DermaPlast ACTIVE: 1 = short I-strip outside. 2 = short I-strip inside; both overlap to form an oval around the uncovered kneecap. 3 = two longer I-strips overlapping above. 4 = check with the knee extended. Light-coloured ends mark the start and end without tension. The arrows only indicate the stroking direction, not the tension.
Image: saneq
Nasara PreCut knee and AcuTop PreCut knee are separate sets of pre-cut strips. Follow the instructions in their respective packages. Their strips do not simply replace the four I-strips of this example.
How is tape applied to the neck and upper shoulder area?
This example also follows Hartmann for DermaPlast ACTIVE. It uses two long I-strips of about 25 cm and two short ones of about 10 cm. It shows a neck application extending towards the tops of the shoulders. This is not a separate application for the shoulder joint.
Lower your head forwards. The helper applies the long strips upwards from the upper back, on either side of the spine. The middle parts are applied with tension according to Hartmann. The upper ends lie without tension below the hairline; the starts also remain tension-free.
Tilt your head to the left without turning it. Keep looking forwards. Have the helper start the right short strip at the back of the neck near the spine, over the long strip. From there, it runs slightly diagonally downwards towards the right acromion, completely without tension.
Tilt your head to the right and keep looking forwards. Have the helper place the left short strip symmetrically on the other side, starting over the long strip and extending towards the left acromion. It is also applied completely without tension.
Stroke the long strips upwards and the short ones from the neck towards the shoulders. Rub them down with your hand. Raise your head and check the fit. The ripples described by Hartmann after the head is raised are not deliberately created folds and do not prove an effect.
Neck application based on Hartmann, DermaPlast ACTIVE: 1 = lower the head; long I-strips beside the spine. 2 = tilt the head to the left, gaze forward; short strip on the right to the acromion. 3 = tilt the head to the right; short strip on the left. 4 = check with the head upright. Light-coloured ends mark the start and end without tension. Arrows only indicate the stroking direction.
Image: saneq
For Nasara PreCut neck, the included illustrated instructions apply. The Hartmann application shown here is not a guide for this set.
How long can I wear kinesiology tape?
The information varies depending on the product and source. Follow the current instructions included with your tape and remove the tape earlier if you experience discomfort. A stated wearing duration is not a target to be reached despite skin reactions.
Manufacturer information: no longer than 7–10 days; then a break.
Water-resistant; showering, bathing, and swimming are described.
95 % cotton, 5 % elastane.
The table reflects the respective sources, researched in September 2026. It does not imply a general recommendation to wear tape for ten days. As general clinical advice, Hirslanden gives a maximum of seven days if the tape is well tolerated and adheres well. This is not a limit specified by Nasara.
Can I shower and do sports with kinesiology tape?
With a suitable, water-resistant tape, showering is generally possible. Hartmann also describes bathing and swimming. Let wet tape dry afterwards. Hartmann suggests a hairdryer on the lowest setting as an option. Do not rub the tape dry, as it may come off.
Avoid heat, direct sunlight, and heat build-up under clothing over the tape. According to Hirslanden, movement and sweating are possible with tape. Whether you can take part in sport with your symptoms must be assessed independently.
How do I remove kinesiology tape gently from the skin?
Moisten the tape slightly before removal, as recommended by DRACO. If necessary, use a suitable medical adhesive remover according to its instructions. Hartmann gives about 1–2 minutes for the soaking method described in its instructions. This is not a standard contact time for all products.
Carefully loosen an edge. Roll the tape back slowly in the direction of hair growth. Keep the tape flat and close to the skin.
Hold the skin directly behind the already loosened tape with a finger. Work section by section without pulling the skin upwards.
Remove adhesive residues and check the skin. Give it a break. Do not apply new tape to irritated skin.
According to product information, the Mueller Tape & Tuffner Remover leaves an oily film. Remove it with water and soap before re-taping. Let the skin dry. More medical adhesive removers can be found in the taping accessories.
What should I do in case of itching or other skin reactions?
Remove the tape immediately if you notice the following signs:
Swelling or discoloration.
Numbness, tingling, or other sensory disturbances.
Increasing pain caused by the tape.
Itching, redness, burning, rash, or other skin irritations.
Signs of an allergic reaction.
Have persistent or severe symptoms medically evaluated. Do not apply new tape until the issue is clarified. Do not wait for a specific period if reactions occur.
According to the BMJ announcement on Mo et al., only 19 of 310 studies reported side effects. The most frequently mentioned were skin irritation and itching. These usually resolved without further treatment. The frequency of occurrence among users cannot be reliably derived from this.
These five products include rolls to cut to size and PreCut sets for specific body areas. The selection is neither a test nor a comparison of effectiveness. The reasons for the selection:
Each PreCut set has its own package instructions, which were not assessed for this guide; they may describe applications that differ from those shown here. The product pages show the currently available variants.
Frequently asked questions
Yes. Incorrect tension, stretched ends, constriction, or folds introduced during application can cause problems. Have the specific application demonstrated professionally. The start and end remain without tension; remove the tape if you experience discomfort.
Consult your doctor beforehand. This is also required by the Hartmann instructions for use. A general guide cannot assess whether and where taping is appropriate during your pregnancy.
After removing the tape, Hartmann recommends taking a break and removing adhesive residues. The instructions do not specify a fixed number of hours. Do not apply tape to irritated skin. Consult a medical professional if skin reactions recur.
The sources cited do not give a general wearing duration specifically for the knee. The decisive factors are your product's instructions, professional guidance, and your skin tolerance. Remove the tape immediately if swelling, discoloration, sensory disturbances, increased pain, or skin reactions occur.
No reliable benefit can be derived from this. The review by Inostroza-Quiroz et al. (2026) rates the effect on radiating back pain as uncertain. Have such symptoms medically evaluated. The knee and neck examples are not treatments for this.
For this Hartmann application, you need a second person. They assist with the application path and changing head positions. Have the application demonstrated in physiotherapy beforehand; help with applying the tape alone does not replace this instruction.
Yes. Hirslanden describes its own shoulder applications. Have the appropriate technique demonstrated by a professional. Our neck example with strips extending towards the tops of the shoulders is not a guide for the shoulder joint.
Still unsure? Discuss unexplained symptoms and the appropriate application for your situation with your physiotherapist or doctor. For questions about products, package contents, and availability, saneq is here to help.